No products in the cart.

Learn how to select the perfect subject for your vector art projects. This guide covers key considerations for creativity and professional results.
Before you even select a hide or a thread, the most critical step in any leathercraft project is defining its purpose. This foundational question—"What is this item meant to do?"—dictates nearly every subsequent decision. A project without a clear purpose is like a ship without a rudder; it may look like a boat, but it will drift aimlessly. Defining the purpose goes beyond a simple description like "a bag" or "a wallet." It involves understanding the functional requirements, the aesthetic goals, the intended user, and the environmental conditions the item will face. This clarity is your blueprint, ensuring that materials and techniques are chosen for performance and longevity, not just appearance. Investing time in this initial planning phase prevents costly mistakes, reduces material waste, and saves you from the disappointment of a beautiful object that fails in its primary function.
To translate a vague idea into a concrete plan, you need to ask a series of targeted questions. These questions break down the abstract concept of "purpose" into actionable criteria.
Once the purpose is clearly defined, you can make intelligent choices about materials. Leather is not a single material but a category with immense variety. Selecting the right type is paramount. For example, a purpose-defined project for a hard-wearing dog collar would logically lead you to a thick, stout leather like bridle leather or oil-tanned leather, known for its weather resistance. Conversely, a project aimed at creating a delicate, lined journal cover would be better served by a softer, more pliable leather like goatskin or calfskin. The tanning process is equally important. Vegetable-tanned leather is firm and ideal for tooling and forming, making it perfect for purpose-driven items like structured belts or carved holsters. Chrome-tanned leather is softer, more pliable, and available in a vast array of colors, making it suitable for bags, clothing, and upholstery where flexibility and color are key to the purpose. Choosing a leather that aligns with the project's intent ensures the final product is both beautiful and fit-for-purpose.
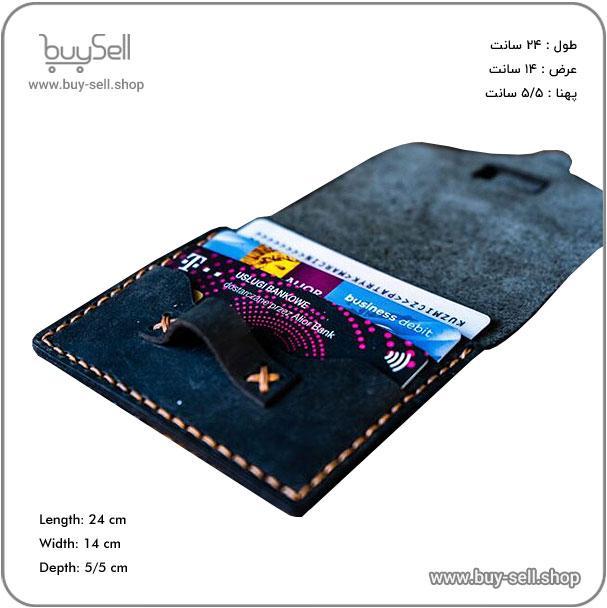
Product purchase offer: leather bag pattern
Many crafting frustrations stem from neglecting to fully consider the project's purpose from the outset. A frequent error is selecting leather based purely on its immediate visual appeal without regard for its functional properties. Using a soft, delicate calfskin for a tool roll meant to protect heavy, sharp metal implements is a recipe for premature failure. The leather will stretch, scuff, and tear quickly. Another common mistake is misjudging the required thickness. A wallet made from leather that is too thin will lose its shape and feel flimsy, while one made from leather that is too thick will be bulky and inflexible, defeating its purpose as a sleek, pocket-sized organizer. Overcomplicating a simple item is also a pitfall; adding excessive tooling, compartments, or hardware to a basic key fob can make it cumbersome rather than convenient. By keeping the core purpose forefront in your mind, you can avoid these errors and create a harmonious and successful piece.
Ultimately, understanding your project's purpose is not a one-time box to check at the beginning. It is a guiding principle that should be referenced at every stage of creation. When you are deciding on a stitch type, ask which is most durable for the intended stress. When applying a finish, consider what level of water or scratch resistance is necessary. A clearly defined purpose brings coherence and intention to your work, elevating it from a simple assembly of parts to a thoughtfully crafted object. It empowers you to make confident decisions, resulting in a final product that not only meets but exceeds expectations. Whether you are a beginner or a seasoned artisan, returning to the fundamental question of "why" will always lead to stronger, more satisfying, and more professional results in the art of leathercraft.
The most critical factor in choosing a subject is a thorough understanding of the project's primary objectives. Before any material or technique is considered, you must define the purpose of the final product. Is it intended for high-frequency daily use, such as a wallet or belt, where durability is paramount? Or is it a decorative item, like a themed journal cover, where aesthetic appeal and intricate tooling take precedence? The intended function dictates nearly every subsequent decision. For instance, a bag designed for carrying heavy books or laptop equipment requires a structurally robust leather, whereas a delicate keychain fob can utilize softer, more supple hides. Clearly outlining the functional demands, expected lifespan, and even the target audience's expectations provides a solid foundation for the selection process, preventing mismatches between the material's properties and the item's real-world use.
Once the project's purpose is clear, the next step is to select the appropriate type of leather, which is fundamentally determined by its tanning process. The tanning method converts raw animal hides into stable, non-decaying leather, and each method imparts distinct characteristics.
Choosing between these types is a balance between the desired aesthetic (e.g., a natural, aging leather vs. a consistently colored one) and functional needs (e.g., rigidity vs. flexibility).
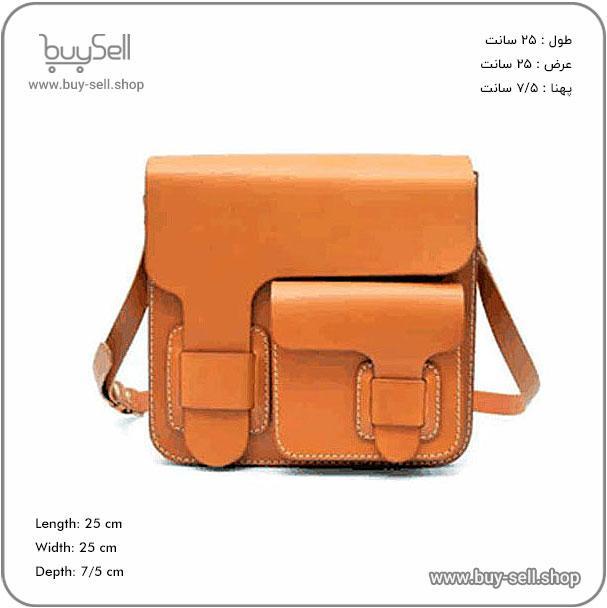
Product purchase offer: leather briefcase pattern
Not all leather within a given type is created equal. The grade of the hide is a crucial factor influencing both the project's outcome and its cost. Leather grading is often based on the number of natural imperfections on the hide's surface, such as scars, insect bites, and wrinkle marks.
Inspecting the leather for consistent thickness, tightness of the grain, and a pleasant, natural smell are practical ways to gauge quality beyond the label.
Leather thickness, typically measured in ounces (oz) or millimeters (mm), directly impacts the structure and feel of the final product. One ounce is approximately 1/64 of an inch. Selecting the correct weight is essential for both functionality and craftsmanship.
Thin leathers (1-2 oz / 0.4-0.8 mm) are suitable for lining, intricate inlays, or lightweight garments. Medium-weight leathers (3-5 oz / 1.2-2.0 mm) are versatile for most bags, wallets, and straps. Heavy-weight leathers (6-10 oz / 2.4-4.0 mm and above) are reserved for structural components, heavy-duty belts, saddlery, and soling. A common mistake for beginners is using leather that is too thick for the intended item, making it difficult to stitch, bend, or achieve a refined finish. For complex items, skiving (thinning) the edges of the leather is often necessary to reduce bulk, which is another factor to consider during the selection process.
The final selection is a synthesis of all these interdependent factors. A successful project begins by aligning the core requirements with the inherent properties of the leather. For example, crafting a durable, heirloom-quality briefcase would likely lead you to select a full-grain, vegetable-tanned leather in a medium-to-heavy weight. Conversely, creating a fashionable, soft crossbody bag would point you toward a supple top-grain or full-grain chrome-tanned leather. There is rarely a single "correct" answer, but rather an optimal balance between aesthetics, functionality, workability, and budget. By systematically evaluating these key factors—project purpose, tanning type, leather grade, and thickness—you can confidently select the perfect subject for your leathercraft endeavor.
Creative inspiration is the initial spark that fuels the transformation of raw leather into a unique and functional piece of art. Unlike a simple manufacturing process, leatherworking thrives on this influx of new ideas. It is not merely about replicating a pattern perfectly; it is about interpreting a concept, solving a functional problem, or expressing a personal aesthetic through the medium of leather. The first step to finding inspiration is to cultivate a mindset of curiosity and observation. See the world as a source of potential patterns, textures, and stories. The grain of a wooden table, the concentric circles of a tree stump, or the architectural lines of a cityscape can all be translated into tooling patterns, structural designs, or decorative elements. By training yourself to see creative potential in your everyday environment, you build a reservoir of ideas to draw upon when you sit down at your workbench.
Waiting for inspiration to strike is an unreliable strategy. Instead, proactive methods can systematically generate creative concepts. One of the most effective approaches is dedicated research. This goes beyond a quick internet search; it involves deep dives into historical artifacts, fashion archives, and the natural world. Examine how leather was used in different eras—the rugged simplicity of frontier gear, the ornate tooling of the American West, or the sleek minimalism of mid-century modern design. Another powerful method is material exploration. Sometimes, the leather itself is the inspiration. Handling a new type of hide, such as the supple texture of full-grain calfskin or the rugged character of a waxed pull-up leather, can immediately suggest a project suited to its properties. Try these techniques to actively seek inspiration:
Let's consider a scenario to illustrate this process. Imagine you are inspired by the aesthetic of classic maritime equipment—thick ropes, weathered brass, and sturdy canvas. This is your initial spark. To translate this into a leather good, you begin by extracting key elements: the colors (navy, tan, bronze), textures (coarse, worn), and themes (durability, adventure). You might decide to create a field notes cover. Instead of a standard design, you could:
This scenario demonstrates how a broad theme can be broken down into specific, actionable design choices, guiding your material selection and construction techniques to create a coherent and inspired final product.
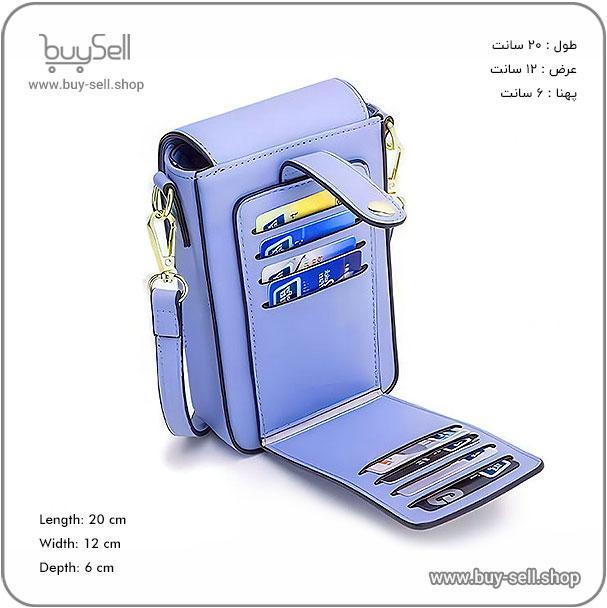
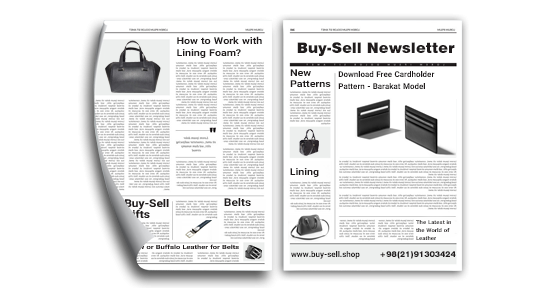
Product purchase offer: Leather card holder pattern
Every creator encounters periods where inspiration seems to dry up. A common mistake is to force creativity, which often leads to frustration. Instead, step away from the workbench. Engage in a completely different activity—go for a walk, visit a museum, read a book, or work on a simple, repetitive task like cutting strap blanks or conditioning leather. This allows your subconscious mind to work on the problem. Another block arises from the pressure to be entirely original. Remember that originality often comes from synthesis, not creation from nothing. Combining elements from different sources—for example, the structure of a Roman coin purse with the aesthetic of modern streetwear—can yield a truly unique result. Do not be afraid to iterate; your first version of an idea is rarely your best. Make a prototype, identify what you like and dislike, and use that knowledge to refine the design in the next iteration.
Finding creative inspiration is not a one-time event but a continuous practice. The most prolific and innovative leatherworkers are those who have integrated inspiration-seeking into their daily routine. They carry a notebook to jot down ideas, maintain an organized library of material samples, and regularly set aside time for experimentation without the pressure of a final product. This disciplined approach ensures a steady flow of ideas. Ultimately, the goal is to build a personal connection to your work. When a piece is born from genuine inspiration, that passion and thoughtfulness are embedded in every stitch. It transforms the object from a commodity into a story, making the process of finding creative inspiration the most valuable skill in a leatherworker's toolkit.
Every exquisite leather creation begins not with a cut of hide, but with an idea. Sketching and refining is the crucial bridge between a vague concept in your mind and a physical, functional piece of art. This phase is about giving your idea a form, exploring its proportions, and identifying potential challenges long before you invest in expensive materials. Think of it as the blueprint for your project. A well-executed sketch serves as a roadmap, detailing dimensions, stitch lines, and component relationships. It forces you to consider the project from all angles, literally and figuratively. Moving from a rough thumbnail sketch to a more detailed technical drawing allows you to spot design flaws, such as an awkward strap length or a buckle placement that compromises usability. This proactive problem-solving saves time, leather, and frustration, ensuring your final product is both beautiful and practical.
You don't need to be a master artist to create useful sketches for leathercraft. The goal is clarity, not artistic perfection. Start with simple tools: a pencil, an eraser, a ruler, and graph paper. Graph paper is particularly valuable as it helps maintain scale and proportion. Begin with quick, low-fidelity sketches to explore the basic shape and silhouette of your item. Is it a structured tote bag or a soft, slouchy briefcase? Once the general form is decided, progress to a more detailed sketch. This should include front, back, and side views, along with close-ups of any complex elements like pockets, flaps, or intricate tooling patterns. For precision, consider creating templates or patterns directly from your refined sketch by tracing the final lines onto sturdier cardstock or pattern plastic. This method ensures symmetry and consistency if you plan to make the item multiple times.
The refinement stage is where you troubleshoot potential construction issues. A sketch allows you to visualize the order of operations. Ask critical questions as you draw. How will the gusset attach to the main panel? Where will the seams fall, and will they be visible or hidden? Does the design account for the thickness of the leather, especially where multiple layers meet? For example, sketching a wallet reveals the challenge of "edge build-up"—the cumulative thickness of leather at the seams. Your sketch can help you plan for skiving (thinning the leather edges) to create a sleeker final product. Similarly, planning a belt requires deciding on the buckle attachment method; your sketch should detail whether you'll use a fold-over loop, a prong bar, or a Chicago screw. By solving these problems on paper, you transition from someone who just follows patterns to a true designer who understands the mechanics of leather construction.
Rushing the sketching phase is one of the most common mistakes beginners make. Skipping detailed sketches often leads to wasted materials and disappointing results. A primary pitfall is misjudging dimensions. A bag that looks perfectly proportioned in a rough sketch might turn out to be impractically small or awkwardly large once constructed. Another frequent error is failing to account for material behavior. Leather is not like paper or fabric; it has rigidity and grain direction. Your sketch should note the intended grain direction for each piece to ensure structural integrity and desired drape. Furthermore, overlooking small but critical details like reinforcement patches, rivet placements, or the space needed for turning a item right-side-out can cause major setbacks during assembly. A thorough refinement process, complete with annotations on your sketches, acts as a checklist to prevent these oversights.
Sketching and refining your idea is not an optional preliminary step; it is the foundational act of design. It transforms inspiration into intention. This disciplined approach separates hobbyists from professionals. By investing time in this phase, you gain a deep understanding of your project's anatomy. You build confidence, knowing that each cut and stitch has been thoughtfully considered. The paper stage is the most forgiving and inexpensive place to make mistakes. Embrace the iterative process of drawing, critiquing, and redrawing. Each revision brings you closer to a design that is not only aesthetically pleasing but also structurally sound and a joy to create. A well-refined idea on paper is the first, and perhaps most important, stitch in any leatherworking project.
The final step in selecting your vector design subject involves a honest assessment of its technical demands versus your current skill level. A subject with intricate details, like a realistic portrait with complex lighting and textures, requires advanced knowledge of Bezier curves, gradient meshes, and layering techniques. While ambitious projects are excellent for growth, choosing a subject that is too complex can lead to frustration and an unfinished piece. Conversely, a subject that is too simple might not challenge you or showcase your full potential. The ideal subject strikes a balance, pushing your abilities just enough to be engaging without being overwhelming. Consider starting with a subject that has a manageable level of detail, allowing you to focus on executing clean lines, cohesive color palettes, and a strong composition. This thoughtful evaluation ensures the final project is not only successful but also a valuable learning experience that builds your confidence for more intricate designs in the future.
A key advantage of vector design is its inherent scalability; graphics can be resized from a tiny favicon to a massive billboard without any loss of quality. When finalizing your subject, it is crucial to consider its potential applications beyond the initial project. Will this design need to work as a logo, a poster, and a social media icon? If so, the subject must be recognizable and effective at both very small and very large scales. This often means simplifying the design to its most essential elements and avoiding overly fine details that will disappear when scaled down. A versatile subject is one with a strong, clear silhouette that remains impactful regardless of size. Thinking about scalability from the outset future-proofs your work, making it a more valuable asset for personal branding, client work, or stock illustration. It forces you to focus on the core strength of your subject, resulting in a cleaner, more professional, and ultimately more useful final product.
Before you begin the detailed work, solidifying the artistic style for your vector subject is paramount. The subject itself is only half of the equation; how you choose to render it defines the final outcome. Will it be a minimalist flat illustration with bold shapes and limited colors, a detailed isometric projection, or a more organic, hand-drawn style? Your choice of style should align with the intent of the piece. A corporate logo demands clarity and simplicity, while a piece of narrative art might benefit from more texture and detail. Making a conscious decision about style guides every subsequent choice, from the types of paths you draw to the color palette you select. It creates cohesion and prevents the design from feeling disjointed. A well-defined style acts as a creative blueprint, ensuring that all elements of the vector work harmoniously together to convey the intended message or emotion, resulting in a polished and professional-looking design.
Follow us on Instagram and Telegram
The final act of finalizing your subject is a comprehensive pre-production review. This is the moment to step back and scrutinize your chosen subject and plan from every angle. Ask critical questions: Does this subject have a clear focal point? Is the composition balanced? Have you considered copyright issues if you are using reference material? It is also wise to gather feedback from peers or your target audience at this stage; a fresh perspective can reveal potential issues or opportunities you may have overlooked. This review process is your last line of defense against fundamental flaws that could undermine hours of work. It is the difference between proceeding with confidence and discovering a major problem halfway through the project. By meticulously reviewing your subject, its stylistic treatment, and its technical requirements, you solidify your vision and create a strong foundation for a smooth and successful vector illustration process, minimizing revisions and maximizing the quality of the final output.

May 04, 2025

Apr 28, 2025

Apr 20, 2025
Apr 23, 2025

Oct 25, 2025
Subscribe to the Buy Sell newsletter and enjoy its benefits.