No products in the cart.

A step-by-step guide to creating a high-quality visual preview for your CorelDRAW files, perfect for presenting designs to clients.
In the context of digital asset management, a file preview is far more than a small, low-resolution image. It is an interactive, dynamic representation of a file's content, allowing users to assess its relevance, quality, and suitability without downloading or opening it in its native application. In the leather industry, this translates to being able to scrutinize the texture of a full-grain hide, examine the stitch detail on a prototype bag, or navigate through a multi-page technical specification document—all within a web browser or software interface. This capability transforms a static file list into a browsable, visual catalog, drastically reducing the time and effort required to locate specific assets.
The practical benefits of robust file previews directly impact operational efficiency. For a leather goods designer, quickly flipping through previews of ten different leather swatch images is faster than downloading ten high-resolution photos. For a production manager comparing CAD files for a new wallet line, a 3D model preview can reveal design inconsistencies instantly. This immediate visual validation minimizes errors in material selection and design approval, ensuring that the correct file progresses to the next stage. It streamlines collaboration, as team members can reference the exact visual detail in comments and markups without ambiguity. Essentially, file previews act as a critical quality control checkpoint before any physical resources are committed.
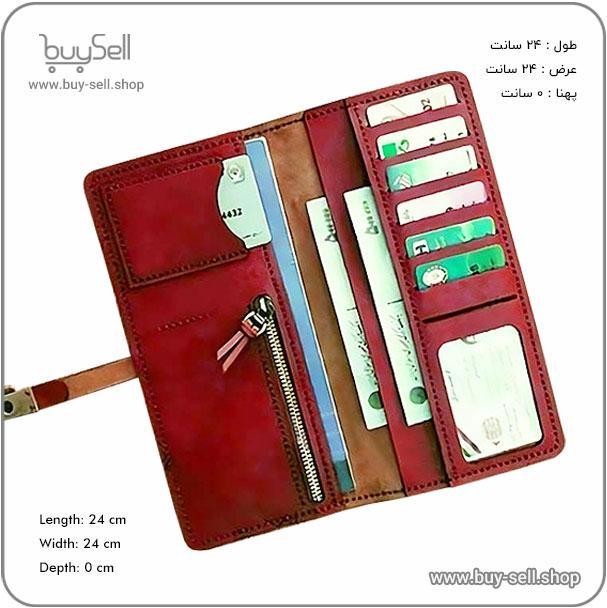
Product purchase offer: Leather Phone Case Pattern
Creating effective previews relies on backend processing. Common methods include server-side rendering, where a server converts file content into a standard web-friendly format like a PNG image or PDF, and client-side rendering, where lightweight code in the user's browser generates the preview. For specialized leather industry files, such as vector designs (AI, SVG) or complex material simulation files, support for specific preview generators or plugins may be necessary. The goal is to balance fidelity with performance; a preview must be detailed enough to be useful but generated quickly to not hinder the user experience. Secure handling is also paramount, as the preview system must access file data without exposing the original file to unauthorized access.
A poorly implemented preview system can create more problems than it solves. Common mistakes include generating previews that are too low-quality to discern critical details like leather grain or color accuracy, failing to support essential industry-specific file formats (e.g., .DXF for cutting machines), or creating a system so slow it negates the time-saving benefit. Security misconfigurations can also leak sensitive design files via the preview mechanism. Best practices to avoid these pitfalls involve:
Ultimately, a sophisticated file preview system is not a luxury but a foundational component of modern digital asset management, especially in a visually and technically detailed field like leather crafting and manufacturing. It bridges the gap between digital information and physical product creation. By providing instant, reliable visual feedback, it empowers teams to make faster, more confident decisions, reduces costly errors in material and design selection, and fosters a more collaborative and efficient digital workspace. Investing in a robust preview infrastructure yields a significant return in saved time, improved accuracy, and enhanced workflow fluidity.
The foundation of a successful leather design project in CorelDRAW lies in the initial document setup. Properly configuring your document properties prevents significant issues during the vectorization, scaling, and final cutting or tooling stages. Start by creating a new document and immediately setting the page size. This should reflect the actual dimensions of your leather piece, not just your design. For instance, if you are designing for a 12-inch by 8-inch panel, set your document to those exact dimensions. This provides an accurate workspace and helps with material planning.
Next, configure the most critical property: the resolution. For print and design work destined for physical leather crafting (like digital printing on leather or creating precise templates), a resolution of 300 DPI (dots per inch) is the professional standard. This ensures your design holds fine detail when transferred to a physical medium. The color mode is another essential setting. Set your document to CMYK (Cyan, Magenta, Yellow, Key/Black) color mode if the final design will be printed onto the leather using a digital or screen-printing process. For designs that will guide hand-tooling, laser cutting, or are simply templates, RGB mode is acceptable, but CMYK is a safer default for any color work tied to physical output.
A clean, well-organized document is crucial for efficiency and accuracy, especially when dealing with the complex shapes common in leather patterns. Utilize CorelDRAW’s Layers docker (found under Window > Dockers > Layers). Create separate layers for different elements of your design. A typical structure might include layers for: the main outline/cut line, interior decorative engraving or tooling lines, guide marks or registration points, and any background or color fill areas. This non-destructive organization allows you to hide, lock, or edit specific parts of your design without affecting others.
Object management goes hand-in-hand with layering. Use the Object Manager docker to see every shape, curve, and text element in your document. Consistently naming your objects and groups (e.g., "Wallet_Back_Outline," "Floral_Fill_01") saves immense time during editing. For leatherwork, pay special attention to closed paths. Shapes that will be cut or filled must be perfectly closed paths. Use the "Close Path" functions in the Object menu to ensure there are no gaps in your outlines. Additionally, combine related objects using the "Combine" command (Ctrl+L) for cutting paths, but use "Group" (Ctrl+G) for logical groupings you may need to edit separately later.
Precision is paramount in leathercraft. CorelDRAW's guideline and registration mark system is indispensable for achieving it. Drag guidelines from the rulers onto your document to mark key boundaries, center points, stitch lines, and fold lines. To place a guideline precisely, double-click on a ruler where you want it to appear, or use the guideline setup options. Locking these guidelines prevents accidental movement. For designs that involve multi-layer projects (like a wallet with interior pockets) or require alignment with physical leather features (like a natural spine), creating a master template layer with these guides is a best practice.
Registration marks are small, precise symbols placed outside the main design area that serve as alignment points for tools or multi-step processes. In leatherwork, they are vital for aligning a design for a second pass (like aligning a debossing stamp with a printed area) or for ensuring a laser cutter reads the design in the correct position on the leather. Common marks include simple crosshairs or circular targets. Create these on a dedicated layer and place at least two, preferably at diagonal corners of your design area. Ensure they are simple vector shapes with clean lines so cutting or optical registration software can easily detect them.
Before exporting your design for use with a laser cutter, plotter, or printer, perform a systematic final check. First, review all critical paths. Select all objects and check the status bar for any open curves. Convert all text to curves (Arrange > Convert to Curves) to eliminate font dependency issues on other systems. Next, clean up your artwork by removing any stray nodes or duplicate lines using the "Curve Smoothness" and "Remove Duplicates" functions. This simplifies the vector data, leading to cleaner machine output.
Adopt these best practices for a reliable workflow:
Thorough document preparation in CorelDRAW translates directly to reduced material waste, fewer machine errors, and a higher quality finished leather product. Investing time in this initial stage streamlines the entire creative and production process.
Product purchase offer: leather bag pattern

In the leather goods industry, exporting digital designs for production is a critical juncture where quality can be preserved or compromised. Optimal quality export settings ensure that the intricate details of your digital artwork—be it embossing patterns, laser engraving guides, or precise cut lines—translate flawlessly into the physical product. This process involves more than simply saving a file; it is about configuring your design software to output data in a format that manufacturing machinery can interpret with zero ambiguity. The primary principles revolve around resolution, color mode, vector integrity, and format specificity. Ignoring these settings often results in blurred logos, misaligned stitching guides, or incorrectly scaled patterns, leading to material waste and inferior goods. Therefore, establishing a robust export protocol is as vital as the design process itself.
The cornerstone of optimal export lies in three technical areas: resolution, color management, and file format selection. For any raster-based elements like background textures or complex photographic etchings, a minimum resolution of 300 DPI (Dots Per Inch) is non-negotiable. This ensures edges remain crisp when transferred to leather. Color mode must be set to CMYK for color-accurate printing or to Grayscale for laser work, avoiding the RGB mode used for screens which can produce unexpected color shifts. Most crucial is the use of vector formats for contours, cut lines, and engraving paths. Formats like PDF, SVG, or AI (Adobe Illustrator) preserve mathematical paths, allowing for infinite scaling without quality loss. A best-practice workflow often involves a layered file: vector paths for cutting/engraving on one layer, and high-resolution raster art for details on another, exported together in a print-ready PDF.
Even experienced designers can encounter quality degradation due to common export mistakes. One frequent error is exporting raster images (like JPEGs or PNGs) for laser cutting files, which creates jagged, pixelated edges instead of smooth cuts. Another is neglecting to convert fonts to outlines, which can lead to font substitution and layout corruption if the production computer lacks the specific typeface. Improper scaling—exporting at "Fit to Page" rather than at 100% scale with defined dimensions—causes parts to be cut at the wrong size. Furthermore, using excessive compression to reduce file size can destroy fine detail in raster images. A systematic pre-export checklist is the best defense against these issues, ensuring every element is production-ready.
Before sending any file to a tannery, laser cutter, or manufacturer, run through a final verification. This checklist standardizes your exports and guarantees consistent quality.
Mastering export settings for optimal quality is a definitive hallmark of a professional leather craftsman or brand. It represents the seamless handoff from creative vision to tangible luxury. By adhering to the technical principles of resolution and vector data, avoiding common pitfalls, and rigorously applying a quality assurance checklist, you guarantee that the integrity of your design is maintained throughout the production chain. This diligence minimizes errors, builds trust with manufacturing partners, and ensures the final leather product reflects the precise quality and detail envisioned in the original design. In essence, perfecting your export protocol is the final, critical step in digital design that safeguards the physical excellence of your leather goods.
Leather is primarily sold and worked with in specific standardized formats that define its shape and usability. The most common is a 'side' or 'half hide,' which is one half of a whole hide split lengthwise down the backbone. This is the standard unit for most crafters and small manufacturers, offering a balanced size for a variety of projects. A full 'hide' is the entire skin, used for larger-scale production. For smaller needs, leather is also available as 'shoulders,' 'bellies,' and 'backs' (or 'butts'), each with distinct characteristics. The 'back' is the prime, most dense area, while the 'belly' is thinner and more stretchy. Knowing these formats is the first step in selecting the right material, as the format dictates the available size of unblemished, high-quality grain area for your design.
Accurately determining the amount of leather you need prevents waste and cost overruns. Start by creating a precise pattern or template for your item, whether it's a wallet, bag, or jacket. Place these patterns on a large sheet of paper to experiment with an efficient layout, factoring in the grain direction—leather has a natural stretch across the width (from spine to belly) that must be considered for structural integrity. You must also account for the natural imperfections in a hide: brand marks, scars, and neck wrinkles. A good rule is to add a 15-20% buffer to your calculated pattern area to accommodate these flaws and ensure you have enough usable material. For garments, this buffer is often larger due to the need for pattern matching.
Matching your project to a recommended leather size simplifies purchasing and minimizes off-cuts. For small accessories, buying by the square foot or from a 'shoulder' is economical. Here is a general guide:
Always consult with your supplier, as hide sizes can vary significantly by animal breed and tanning process.
Even experienced crafters can fall into sizing traps. The most frequent error is underestimating the impact of leather's natural shape and flaws, leading to a project stalling mid-cut. Another is neglecting to consider the 'fall'—the way a garment or bag panel must be cut relative to the spine for proper drape and strength. To avoid these, always inspect a hide or side digitally or in person before purchase to map major flaws. Physically lay your paper patterns on the leather (or a same-sized paper stand-in) before cutting. Furthermore, understand thickness: leather thickness (measured in ounces or millimeters) directly affects the finished size of folded and stitched seams; thicker leather consumes more material in the seam allowance. A precise, pre-purchase plan is the best prevention against costly sizing errors.
Product purchase offer: Leather pattern
Before exporting any preview, establish a cohesive visual identity for the presentation itself. This framework includes using a standard color palette, typography, and layout structure that aligns with your studio's brand or the client's project identity. Consistency builds professionalism and trust. For instance, create a master template within CorelDRAW that includes discreet branding elements, a standardized information block for project name, version, and date, and a neutral background that ensures your design remains the focal point. This practice not only presents your work in the best light but also demonstrates meticulous attention to detail, a quality highly valued by clients and collaborators. A unified presentation style makes your portfolio recognizable and reinforces your professional image across all deliverables.
The workspace setup within CorelDRAW directly impacts the quality of your preview. Begin by ensuring your actual design document is clean, with layers properly named and organized. Before creating a preview, use the 'Fit Page to Window' view to check the overall balance. Then, strategically utilize the 'Page Sorter' view to manage multiple artboards if your project contains several pages or concepts. It is crucial to hide any non-printing elements like guidelines, grid lines, and bleed marks using the 'View' settings before capturing or exporting your preview. For vector work, consider using the 'Enhanced View' mode to display advanced features like transparencies and blends accurately. This step ensures the on-screen representation you are about to share is crisp, uncluttered, and reflects exactly what you intend the final product to look like, avoiding any client confusion over unfinished guide elements.
The export process is where technical precision defines professional quality. For preview images intended for digital presentation, PNG is often the ideal format due to its support for transparency and lossless compression at high resolutions. When using the 'Export' dialog, select a resolution of at least 150 DPI for screen viewing; 300 DPI is standard for proofs intended for print review. Crucially, enable the 'Anti-aliasing' and 'Dithered' options for smoother edges and gradients. If your design includes intricate fonts that may not be on the client's system, convert critical text to curves before export, or ensure you embed font outlines in PDF previews. For multi-page documents, CorelDRAW's 'Publish to PDF' function with the 'Prepress' preset offers excellent control, allowing you to include bleed, crop marks, and color profiles for accurate color representation in the preview.
A professional preview tells the full story of your design. Do not just show the final logo or layout in isolation. Create a presentation that includes key detail views, such as a close-up on intricate typography, pattern details, or the logo's construction guidelines. Show the design in context using simple mockups—for example, place a business card design onto a photographed background or show a fabric pattern on a virtual product. Within CorelDRAW, you can use the 'Export' ranges to create multiple images from different pages or selected objects. Accompany these visuals with brief, clear annotations directly on the preview or in a separate spec sheet. Explain color choices (citing PMS or CMYK values), the rationale behind typographic selection, and the intended application. This layered approach to presentation demonstrates strategic thinking and provides clients with a comprehensive understanding of the work's value and versatility.
follow us in telegram & instagram
The final step in a professional preview process is secure and organized delivery. Protect your intellectual property by embedding low-resolution watermarks on previews for initial client review, with final high-resolution files released upon project approval. Use CorelDRAW's 'Watermark' plugin or create a semi-transparent layer for this purpose. Organize your files logically: for example, a main folder containing subfolders for 'Preview_Images,' 'Print-Ready_PDFs,' and 'Source_Files.' When sending to clients, use professional file-transfer services rather than email for large files, and always include a simple text document that lists the files, their formats, and any specific notes for viewing. This protocol not only secures your work but also provides a flawless client experience, making you easy to work with and underscoring the professionalism evident in your CorelDRAW previews.

May 04, 2025

Apr 28, 2025

Apr 20, 2025
Apr 23, 2025

Oct 25, 2025
Subscribe to the Buy Sell newsletter and enjoy its benefits.