No products in the cart.

Discover the most popular and best-selling laser cut file designs for creating beautiful and intricate MDF woodworking projects.
Medium-Density Fibreboard, commonly known as MDF, is an engineered wood product created by breaking down hardwood or softwood residuals into wood fibers. These fibers are then combined with wax and a synthetic resin binder, such as urea-formaldehyde, and formed into panels by applying high temperature and pressure. The resulting material is dense, flat, smooth, and uniform, with no knots or grain patterns. These characteristics make MDF exceptionally well-suited for laser cutting. Unlike natural wood, its homogeneous composition ensures that the laser cuts and engraves with consistent quality across the entire sheet, producing clean, precise edges without the risk of splintering or uneven burning that can occur with variable wood grains. This predictability is a significant advantage for both prototyping and mass production.
Laser cutting is a subtractive manufacturing process that uses a high-powered laser beam to vaporize material, leaving a high-quality finished edge. The laser beam is generated within the machine and directed by mirrors through a lens that focuses it into an intensely hot, pinpoint spot. For MDF, the laser's thermal energy rapidly burns and vaporizes the wood fibers and resin binder along a predetermined path controlled by computer numerical control (CNC) software. This process excels at producing intricate designs, sharp corners, and fine details that would be difficult or impossible to achieve with traditional mechanical cutting tools like saws or routers. Since it is a non-contact process, there is no tool wear, and the material is not subjected to physical force, which minimizes the risk of breaking delicate parts.
However, a critical aspect of laser cutting MDF is managing the byproducts. The process generates significant smoke and particulates from the vaporized resin and wood. Therefore, a robust exhaust and filtration system is essential to remove these byproducts from the cutting area. Proper ventilation protects the laser's optics from contamination, ensures a clean working environment, and mitigates health risks associated with inhaling the fumes.
Choosing laser cutting for MDF unlocks a suite of benefits that streamline fabrication and enhance design possibilities. The primary advantages include:
Precision and Complexity: Lasers can achieve extremely high levels of detail, allowing for the creation of complex patterns, fine text, and intricate geometries that are perfect for decorative items, architectural models, and custom signs.

Clean and Sealed Edges: The heat from the laser slightly caramelizes the resin in the MDF, effectively sealing the cut edges. This results in a smooth, finished edge that is often ready for use without additional sanding and is less prone to absorbing moisture.
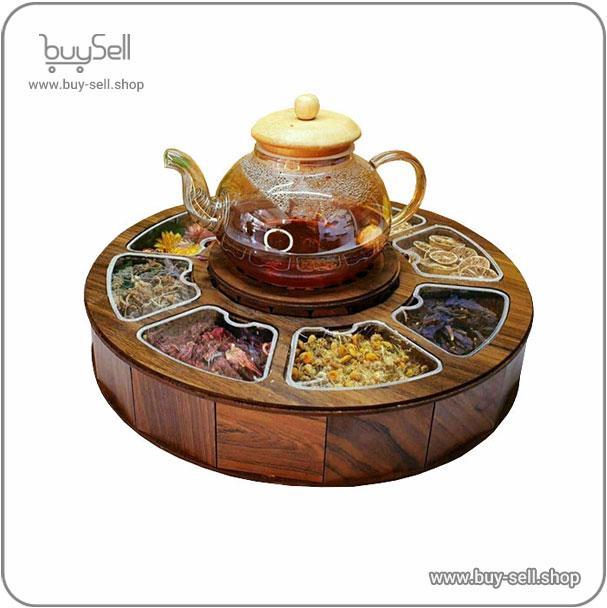
Product purchase offer: Laser design of decorative and kitchen accessories
Speed and Efficiency: For many designs, especially those involving multiple copies or complex paths, laser cutting is significantly faster than manual cutting methods. The digital workflow from design file to finished part allows for rapid prototyping and efficient production runs.
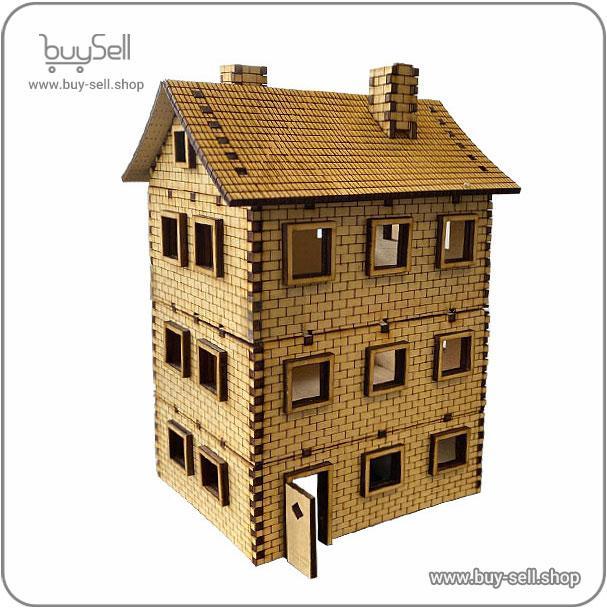
Product purchase offer: Laser Cut Files for Models and Terrariums
No Tooling Costs: Unlike CNC router bits that dull and need replacement, the laser beam does not wear out. This eliminates tooling costs and the downtime associated with changing bits, making it cost-effective for short runs and custom one-off projects.
While laser cutting MDF is a powerful technique, achieving optimal results requires attention to several key factors. One of the most common mistakes is using the wrong type of MDF. It is crucial to select "laser-grade" MDF when possible, which typically has a lower resin content or uses alternative binders that produce less soot and residue. Standard MDF with high urea-formaldehyde content can lead to excessive charring, stubborn residue on the surface, and heavier smoke production.
Another critical factor is meticulous machine calibration. The laser's power, speed, and focus must be perfectly tuned for the specific thickness of the MDF sheet. Settings that are too aggressive can cause deep charring and flare-ups, while settings that are too weak will result in incomplete cuts. Conducting test cuts on a scrap piece of the same material is an essential step before running a full job. Furthermore, operators must be mindful of the fire risk. The concentrated heat can sometimes ignite the material, particularly if the laser head pauses or if cuts are very close together. Modern lasers often include air assist systems that blow compressed air onto the cut line, which helps eject debris and suppresses combustion.
Laser cutting has revolutionized working with MDF, transforming it from a simple building material into a medium for high-precision art and manufacturing. The synergy between the uniform composition of MDF and the pinpoint accuracy of a laser beam enables creators, designers, and engineers to push the boundaries of what is possible. By understanding the material's properties, mastering the machine's settings, and adhering to safe operating practices, one can leverage this technology to produce consistently excellent results. From custom furniture inlays and detailed scale models to personalized home decor, laser-cut MDF offers a versatile and efficient pathway to bring intricate digital designs into the physical world with flawless execution.
In the world of leather crafting and manufacturing, the journey from a designer's imagination to a finished product is a digital one. The file format you choose to save and share your designs acts as a universal language, ensuring that intricate patterns, precise cuts, and detailed engravings are accurately translated by both software and machinery. Using the wrong format can lead to distorted images, loss of detail, or production errors, resulting in wasted time and expensive materials. Understanding the core purpose of each major file format is not just a technicality; it is a fundamental skill for efficient and professional leatherwork. This knowledge ensures your creative vision is perfectly preserved from the digital screen to the textured surface of the leather.
All digital images fall into one of two primary categories: raster and vector. This distinction is the most critical concept to grasp when selecting a file format for leather projects. Raster images are composed of a fixed grid of tiny colored squares called pixels. Common raster formats include JPEG, PNG, and TIFF. They are excellent for representing detailed photographs or complex textural scans of leather grains. However, their major limitation is scalability. Enlarging a raster image beyond its original resolution causes the pixels to become visible, resulting in a blurry or blocky appearance, which is unsuitable for precision cutting or engraving.
Vector images, on the other hand, are defined by mathematical equations that describe points, lines, curves, and shapes. Formats like SVG, AI, and DXF are vector-based. The primary advantage of vector graphics is their infinite scalability. You can enlarge a vector logo or pattern to any size without any loss of quality, as the mathematical formulas are simply recalculated. This makes vector formats indispensable for creating clean, sharp outlines for laser cutting, knife patterning, and tooling designs that need to be adjusted for different product sizes.
Let's examine the specific file formats you will encounter most often and their ideal applications in leather craft.
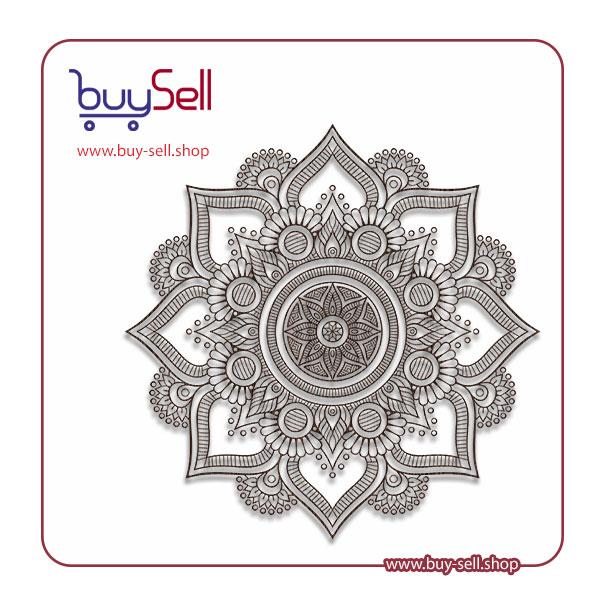
Product purchase offer: Vector mandala
PDF (Portable Document Format): PDF is a versatile hybrid format. It can contain both raster and vector data, making it an excellent choice for sharing final design proofs with clients or manufacturers. A PDF can preserve complex layouts, fonts, and high-resolution images exactly as intended, ensuring everyone sees the same thing. It is the standard for sending comprehensive project files that include multiple elements.
DXF (Drawing Exchange Format): This is a cornerstone format for manufacturing. DXF is a vector format specifically designed for Computer-Aided Design (CAD) software. It is the universal language for CNC machines, laser cutters, and engravers. When you send a DXF file to a machine, it reads the pure vector paths as precise instructions for where to cut or engrave. For any form of automated leatherworking, DXF is often the required format.
SVG (Scalable Vector Graphics): An open-standard vector format that is widely supported by design software and web browsers. SVG files are ideal for creating and editing designs in programs like Adobe Illustrator or free alternatives like Inkscape. They are perfect for developing scalable patterns and icons that can be easily manipulated before being exported to a production format like DXF.
AI (Adobe Illustrator Artwork): This is the native file format for Adobe Illustrator, the industry-standard vector graphics application. AI files contain the full editing capabilities of the software, including layers, effects, and editable text. While excellent for the design phase, AI files should typically be exported to PDF or DXF for sharing with parties who may not have the specific software.
JPEG & PNG (Raster Formats): JPEGs are best for high-quality photographic images but use lossy compression, meaning some image quality is sacrificed for a smaller file size. PNG files support transparency (a clear background), which is useful for overlaying logos or designs onto digital mockups of leather goods. Neither should be used for creating physical cut lines.
Your choice of format should be dictated by the stage of your project. During the initial design and conceptualization phase, working in a native, editable format like AI or SVG is ideal. This allows for maximum flexibility. When the design is finalized and ready for client approval, exporting to PDF ensures the design is viewed consistently. Finally, for production, the design must be prepared as a DXF file or another machine-specific vector format to guide the cutting tools with absolute precision. Always confirm the required format with your laser cutter or manufacturer beforehand to avoid costly compatibility issues. By strategically moving through these formats—from editable vector, to presentable PDF, to production-ready DXF—you create a smooth, professional workflow that bridges the gap between digital art and physical leathercraft.
Leather bag pattern: These are files that are used for laser cutting the bag and make hand sewing of the leather bag easier.
Product purchase offer: leather bag pattern

Before diving into specific design categories, it's crucial to understand the primary types of leather that form the basis of all products. The two most fundamental categories are full-grain and top-grain leather. Full-grain leather is the highest quality, featuring the entire, unaltered grain layer of the hide. It retains the natural markings, such as scars and insect bites, which give it a unique character. This type of leather is exceptionally durable and develops a rich patina over time, becoming more beautiful with age. Top-grain leather, on the other hand, has the outermost surface sanded or buffed to remove imperfections. This results in a more uniform and supple material that is easier to dye and finish, making it very popular for bags and accessories where a consistent look is desired.
Beyond the grain, the finish applied to the leather defines its final appearance and feel. Aniline leather is dyed with soluble dyes without a topcoat of pigment, allowing the natural grain to show through vividly. This results in a soft, breathable leather that is luxurious but can be more susceptible to stains. Semi-aniline leather has a light protective pigment coating, offering a compromise between natural beauty and practicality. Corrected-grain leather, often used for top-grain, has an embossed pattern applied after the surface is corrected, allowing for a wide variety of textures and colors. Finally, patent leather is coated with a high-gloss, plastic-like finish for a dramatic, shiny effect.
Traditional leather goods are defined by their timeless aesthetics, superior craftsmanship, and functional elegance. These designs prioritize longevity and versatility over fleeting trends. In this category, you will find items that have remained largely unchanged for decades, valued for their heirloom quality.
The hallmark of traditional design is its commitment to materials and construction methods that ensure the product not only looks good on day one but continues to serve and improve with age.
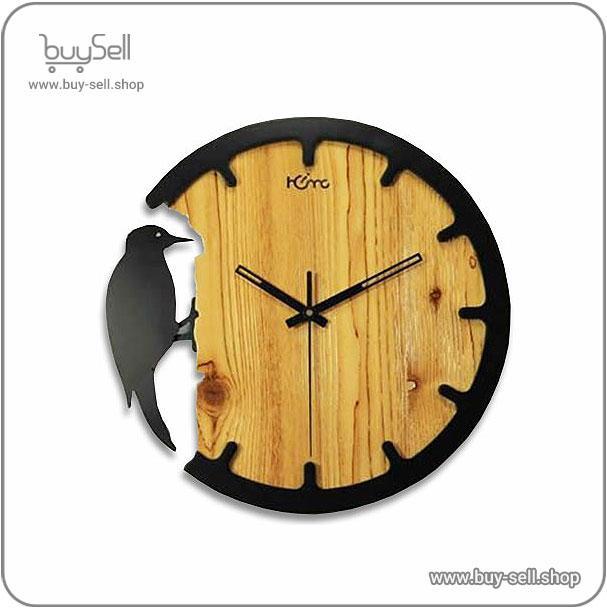
Product purchase offer: Laser Cut Watch Templates
In contrast to the ornate details of traditional pieces, modern leather design embraces minimalism. This category focuses on simplicity, clean geometric shapes, and a "less is more" philosophy. The goal is to create products that are sleek, lightweight, and highly functional without unnecessary embellishment. Designers in this space often use vegetable-tanned leathers or high-quality calfskin for their smooth, uniform appearance.
Modern leather goods often feature innovative construction techniques. For example, laser cutting ensures precision, while techniques like folding and bonding replace bulky stitching to create a seamless look. You'll see minimalist backpacks with hidden zippers, slim cardholders that eliminate the bulk of traditional bifold wallets, and tote bags with simple, elegant silhouettes. The color palette is typically neutral—think shades of grey, black, white, and muted pastels—to emphasize form over flashy color. The appeal lies in the product's ability to integrate seamlessly into a contemporary lifestyle, offering practical utility with a sophisticated, understated presence.
The rustic or artisanal design category celebrates imperfection and the human touch. This style is a direct reaction to mass production, focusing on unique, handcrafted items that tell a story. Leather used here is often vegetable-tanned, a natural process that allows the leather to develop a deep patina and reveals the artisan's handiwork through tooling marks, pull-up effects (where the leather lightens in color when stretched), and natural variations in color and texture.
Common products in this category include tooled leather belts with intricate patterns, rugged duffle bags with visible, heavy-duty stitching, and aprons designed for craftspeople. The designs are not about sleek perfection but about durability, functionality, and character. Buckles may be larger and more utilitarian, edges might be left raw or burnished by hand, and the overall aesthetic is one of rugged authenticity. This category appeals to those who value sustainability, support for small-scale artisans, and products that gain a unique personality through use and age.
Understanding these popular design categories—Traditional, Modern, and Rustic—provides a framework for appreciating the vast world of leather goods. Each style speaks to different tastes, values, and lifestyles, but all share a common thread: a reliance on the unique and enduring qualities of leather as a material.
The single most critical step in choosing leather for your project is understanding the fundamental types available. Leather is not a single, uniform material; its characteristics change dramatically based on the part of the animal hide used and the tanning process it undergoes. Broadly, leather is categorized into two main groups: top-grain and genuine leather. Top-grain leather is the highest quality of commonly available leather. It comes from the top layer of the hide, which is sanded and finished to create a durable, smooth surface that is resistant to stains and moisture. This is the leather you'll find in high-end furniture, quality handbags, and fine apparel. Full-grain leather is a type of top-grain leather that has not been sanded, retaining the hide's natural markings and grain, making it the strongest and most durable, developing a rich patina over time.
Genuine leather, contrary to some marketing, is not an indicator of high quality. The term technically refers to any product made from real leather, but in practice, it often denotes leather from the lower layers of the hide that has been heavily processed, coated with pigments, and embossed with an artificial grain. While it is still a real leather product, it lacks the natural fiber strength and longevity of top-grain or full-grain leather. Other classifications include split leather, which is the fibrous part of the hide left after the top-grain is separated, often used for suede, and bonded leather, which is a reconstituted material made from leather scraps and fibers bonded together with polyurethane or latex onto a fiber sheet.
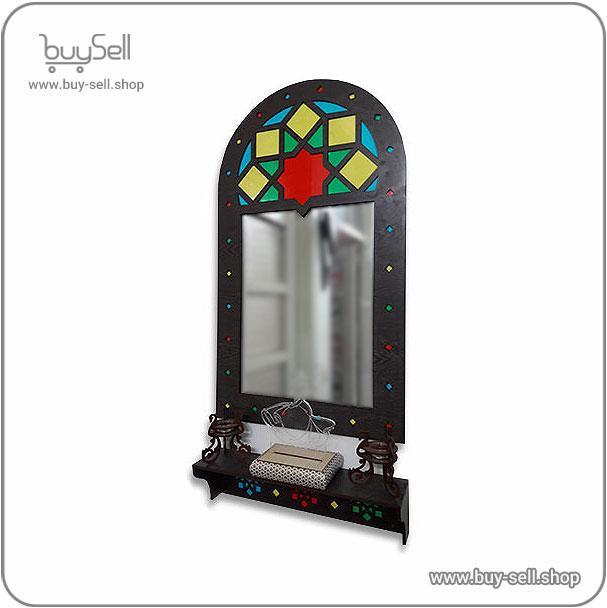
Product purchase offer: Laser cut template for a Tazhib mirror frame Code 114
Once you understand the types, the next step is to match the leather's physical properties to the functional requirements of your project. This involves evaluating factors like thickness, durability, flexibility, and finish. Leather thickness is measured in ounces or millimeters. A thicker, stiffer leather (like 8-10 oz) is ideal for items requiring structural integrity, such as belts, heavy-duty bags, or saddlery. A medium weight (4-5 oz) is versatile for items like wallets, journal covers, and lighter bags. Thin, supple leather (1-3 oz) is perfect for garment-making, linings, or delicate accessories. Durability is intrinsically linked to both thickness and the type of leather; full-grain leather offers the greatest tensile strength.
Flexibility and "hand" (how the leather feels) are equally important. A project like a pair of gloves requires an extremely soft, pliable leather, often a chrome-tanned sheepskin or deerskin. In contrast, a luggage tag can use a firmer, vegetable-tanned leather that will hold its shape. The finish also plays a role. An aniline finish is transparent and allows the leather's natural character to show, but it is more susceptible to water spots and fading. A semi-aniline or pigmented finish adds a protective coating, offering superior resistance to moisture, scuffs, and fading, making it a better choice for high-traffic furniture or items that will face the elements.
Many projects fail before they begin due to simple errors in leather selection. Avoiding these common pitfalls will save you time, money, and frustration. The most frequent mistake is choosing leather based purely on appearance without considering its functional suitability. A beautiful, thin garment leather will quickly fall apart if used for a weight-bearing bag strap. Another critical error is not ordering a large enough piece of leather. Always create a precise pattern first and ensure your hide or side is large enough to accommodate all pieces, accounting for natural flaws you may need to cut around. Buying without seeing and feeling a sample is also a risk, as colors can vary from screen to screen and the "hand" of the leather is difficult to judge online.
To systematize your choice, follow a simple checklist. This ensures you consider all the variables before making a purchase. Start by defining the project's primary purpose and the stress it will endure. Then, determine the ideal thickness and required durability. Consider the desired aesthetic: are you looking for a natural, aging leather or a consistent, colored finish? Next, establish your budget, as leather prices can vary widely from economical genuine leathers to premium full-grain hides. Finally, always try to obtain physical samples from suppliers. Compare the color, texture, weight, and flexibility of several options directly against your project materials.
Choosing the right leather is a foundational decision that dictates the quality, functionality, and longevity of your finished project. By understanding the core types of leather, carefully matching the material's properties to your project's needs, and diligently avoiding common selection errors, you empower yourself to make an informed and successful choice. A thoughtful approach to selection transforms a simple craft into a lasting creation.
The journey to creating a stunning MDF project begins with finding the right design blueprint, known as a laser cut file. These digital files, commonly in formats like SVG or DXF, provide the precise instructions your laser cutter needs. The most reliable sources are established online marketplaces that specialize in digital goods for makers. These platforms host thousands of designs from talented creators worldwide. When browsing, look for marketplaces with robust review systems and clear designer profiles, as these features indicate a trustworthy community. A high number of positive reviews and completed projects using a specific file are strong indicators of its quality and ease of use. These platforms often allow you to filter searches by material type, ensuring the designs you find are specifically tested and optimized for MDF, which behaves differently than acrylic or wood.
Before clicking the download button, a thorough inspection of the file's specifications is essential to avoid wasted material and time. The single most important detail is the file format. Ensure the design is available in a vector format compatible with your laser cutting software, such as DXF, SVG, or AI. Raster images like JPG or PNG will not work for cutting. Next, scrutinize the product description for information on material thickness. MDF sheets come in various thicknesses, and a file designed for 3mm MDF will not assemble correctly if cut from 6mm stock. Reliable sellers will explicitly state the intended material thickness. Also, check if the file includes assembly instructions or a preview of the final assembled product. This is particularly important for complex 3D models, as it helps you visualize the end result and understand the construction process before you commit to cutting.
The creator of the file is as important as the file itself. A designer's reputation is built on consistency, clarity, and customer support. Prioritize files from designers with a substantial portfolio and a history of positive customer interactions. Many marketplaces have a 'follow' or 'favorite designer' feature, making it easy to stick with proven sources. Furthermore, investigate the file's compatibility with your specific setup. Some advanced designs might require a laser cutter with a pass-through feature for larger projects or specific software plugins. Designers who provide comprehensive notes on software requirements demonstrate professionalism and a commitment to their customers' success. Engaging with the designer's community, if they have one, can also provide valuable insights and tips from other users who have already cut the project.
Once you have downloaded a file, your work is not quite done. Proper preparation is the key to a perfect cut. The first step is to open the file in your laser cutting software, such as LightBurn or RDWorks. Carefully examine the design layers. Different colored lines typically represent different operations: red for cutting all the way through the material, blue for engraving, and green for scoring. Verify that these settings are correct for your project. It is also a universal best practice to perform a test cut on a small, inexpensive piece of scrap MDF. This allows you to confirm that the dimensions are accurate, the joints fit snugly, and your laser's power and speed settings are optimized. This small investment of time and material can save you from ruining a full, expensive sheet of MDF due to an unforeseen error in the file or your machine settings.
follow us in telegram & instagram
In the digital age, practicing safe downloading habits is crucial for protecting your computer and personal information. Always download files directly from the official marketplace website and avoid any third-party links that may be shared on forums or social media, as these can be sources of malware. After downloading, it is wise to scan the file with your antivirus software before opening it. For added security, using a dedicated computer for your design and laser work can isolate potential threats from your main personal or work computer. Regarding file management, create a well-organized folder structure on your computer to store your purchased laser files. Categorize them by project type, date, or designer to make future projects easier to start. Keeping your digital library organized ensures you can quickly find and reuse your favorite designs.

May 04, 2025

Apr 28, 2025

Apr 20, 2025
Apr 23, 2025

Oct 25, 2025
Subscribe to the Buy Sell newsletter and enjoy its benefits.